christmas gift 2025
uh oh
christmas 2025 is coming, I'll be honest, I've never put real effort into gift exchanges, and now I've accidently voted to participate in the event
so what to do? I like led cubes, they are super mesmerizing, and a 4x4x4 single color one is ralatively simple and cheap to build, easy choice
since I've had experiences making this (and a bigger one too), might as well go all out and make 3
they'll be protected in acrylic cases and wrapped nicely
one for the event, one for a special person, and one for myself
just plug your usb c cable into the side port and it will light up!
mesmerizing (adj.)
very attractive, in a mysterious way, making you want to keep looking
I learned this word when I first showed my led cube to my minecraft smp friends
thanks, xeahh, the server mom, for teaching me the word
I've since grown up, xeahh was the giver, but now I'm the giver
I hope you and your family are doing well today, I'll never forget it!
the word itself is just as mesmerizing as the lights!
if I hadn't been learning english this way, would I still have the same memory?
tldr
| key | value |
|---|---|
| difficulty | medium (lots of soldering) |
| time | ~10-15 hours (blog writing excluded) |
| cost | ~$800 ntd |
| key tech | arduino nano, c++, led matrix, multiplexing, soldering |
making the cube
there aren't many parts, but it still takes time to source, design, solder, and assemble, well... and write the blog, so be prepared!
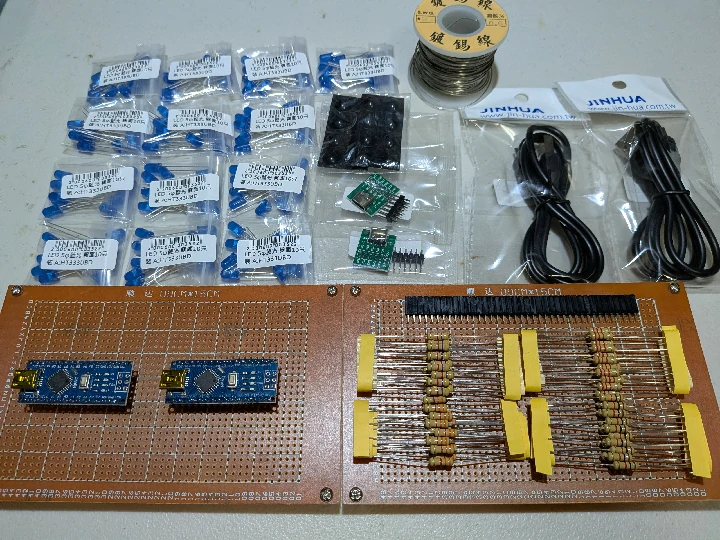
first, prepare the parts
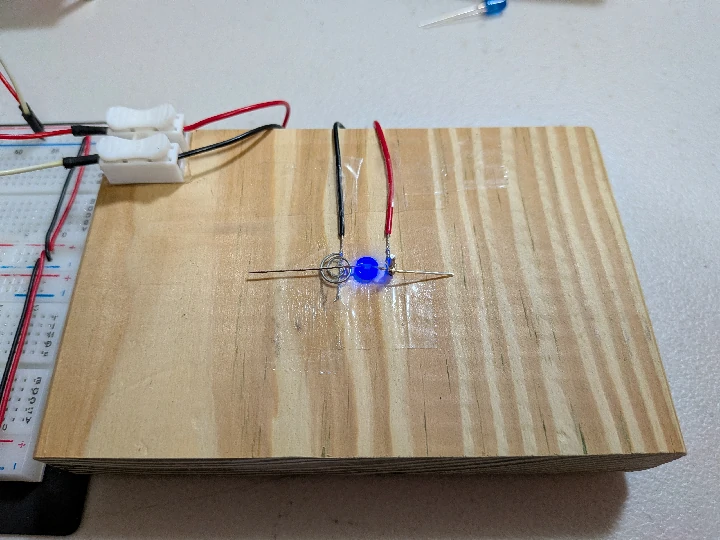
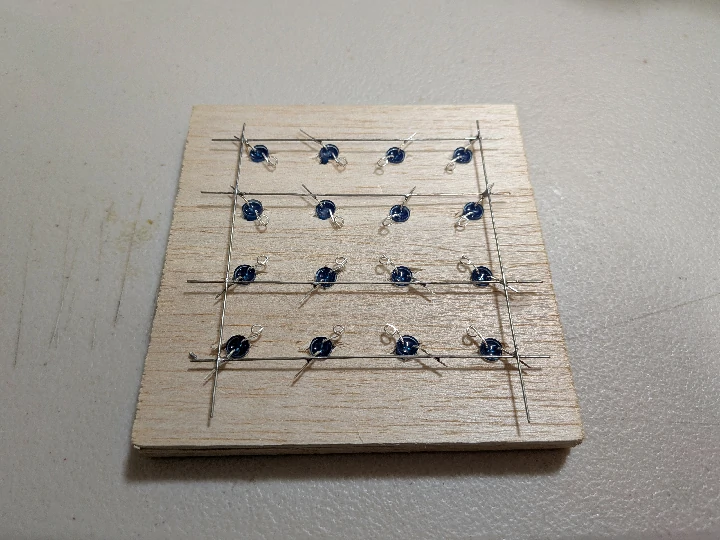
do a basic layout

create the jig, test if they're working, bend the legs, and trim the excess with a side cutter
don't forget to use a resister to limit the current!
a hard wood isn't necessary, in fact, I used a foam board for my first ever led cube!
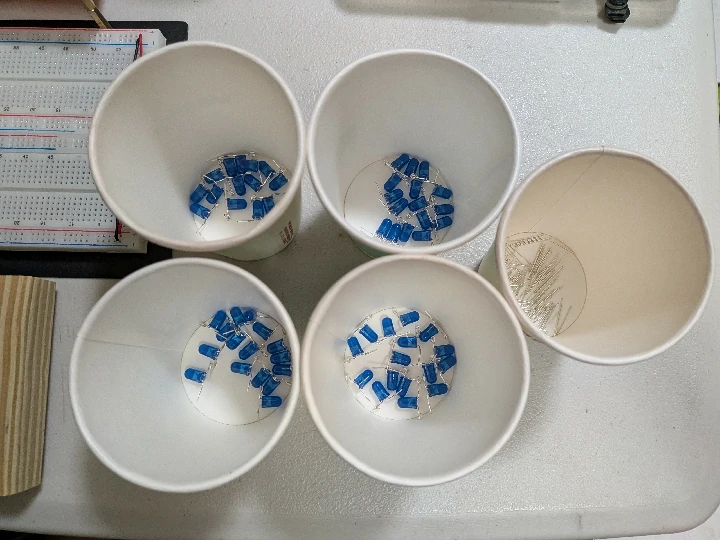
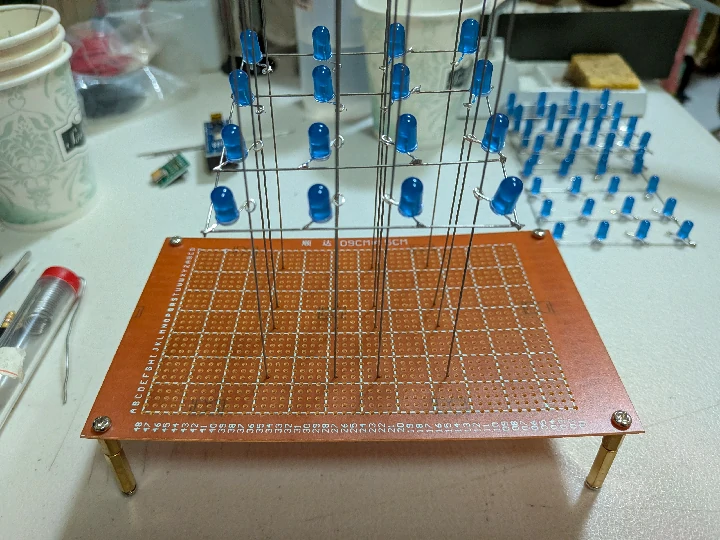
do it 64 times! it shouldn't take longer than half an hour
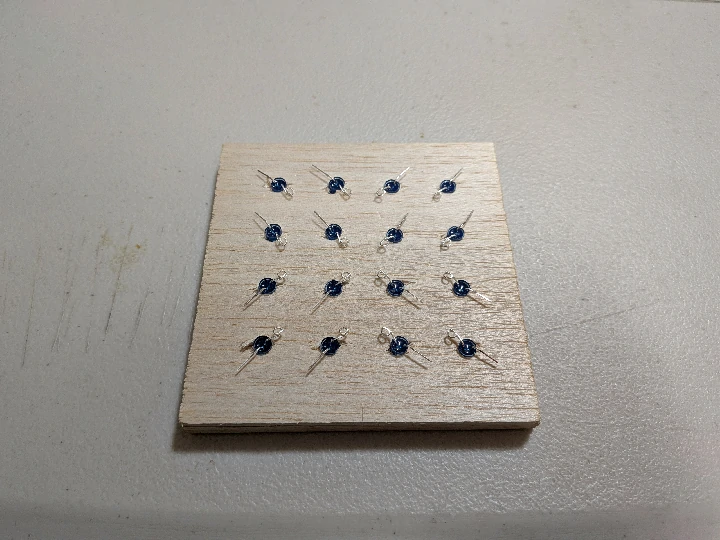
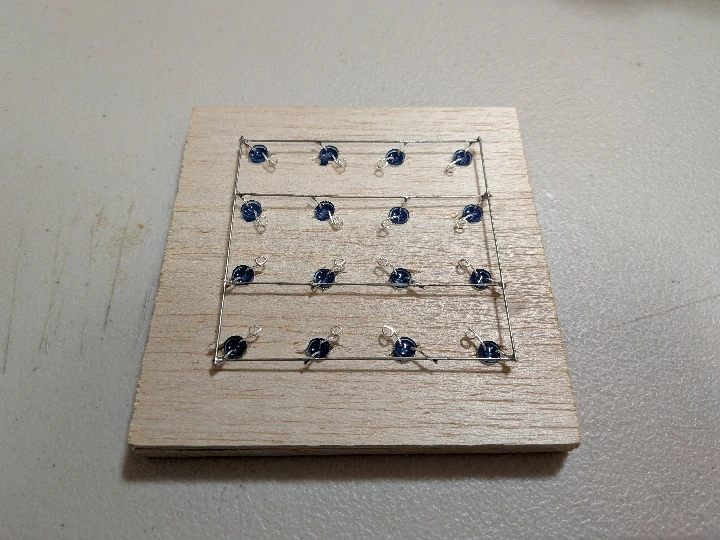
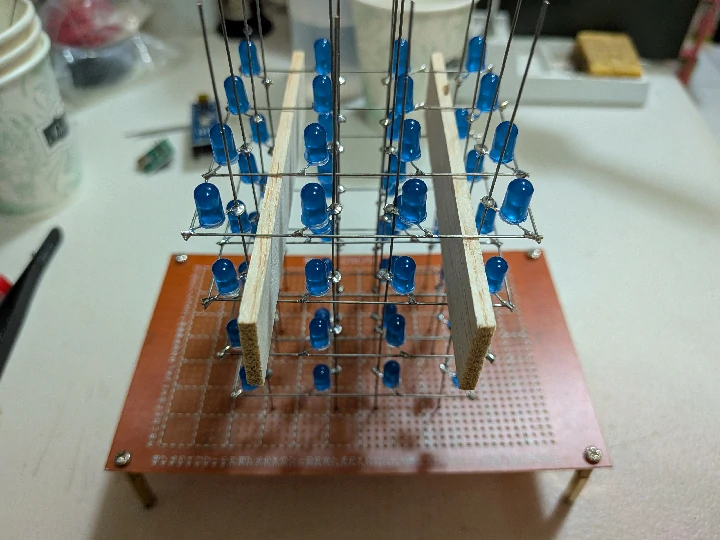
make another jig for the layers
here I used balsa wood, it's soft and light, you can even cut it with your fingernails
it's widely used in modeling for everything from tiny planes to buildings
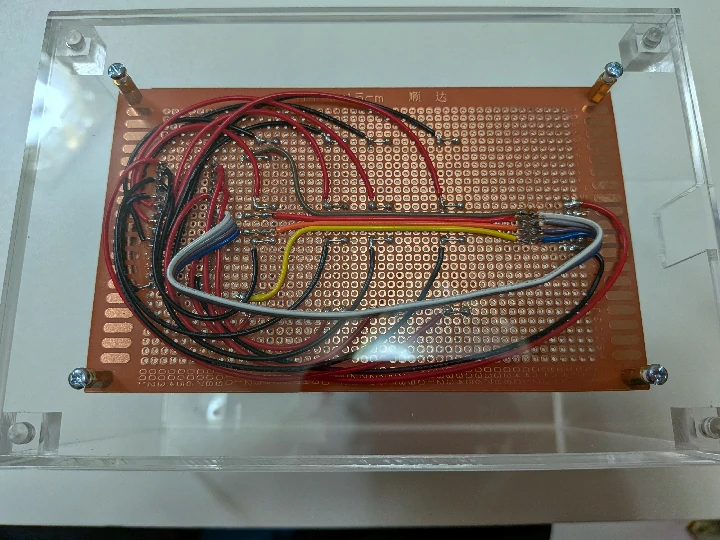
solder the common cathode wires
you can straighten the solid core copper wires by clamping one end down, gently pulling it, and spinning it with an electric drill from the other side
it's also a good time to test each led again with a multimeter
trim the excess wires
do it 4 times
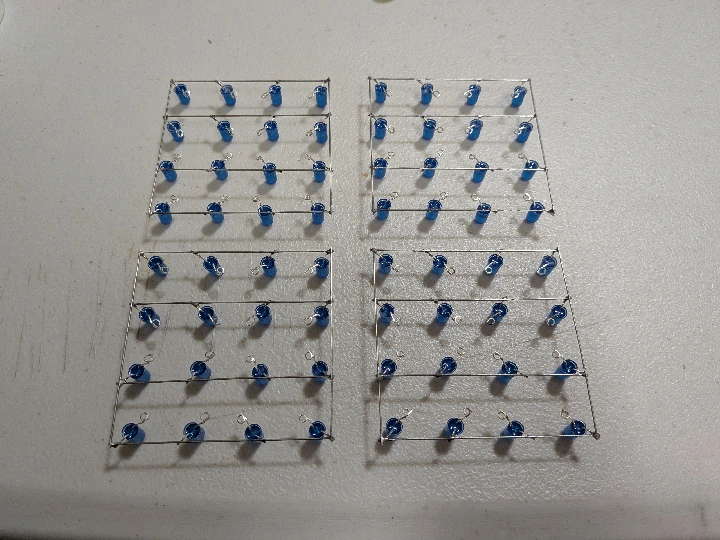
measure where to put the positive column wires and solder them to the board
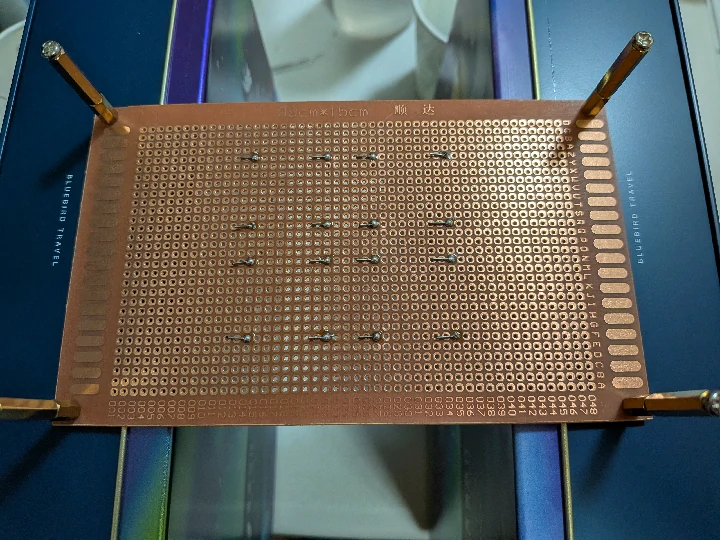
carefully assemble the layers, solder them, add 4 negative wires from the layers to the board, along with the resistors
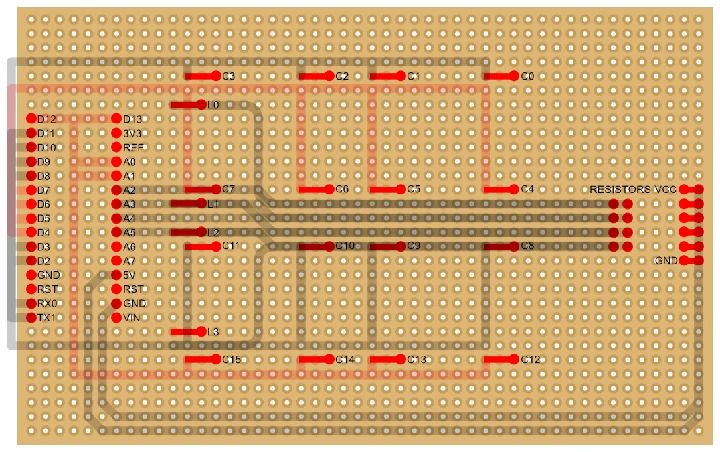
now, solder the arduino on and connect the 16 positive pins and 4 negative pins
after all those pain, we can finally start programming it!
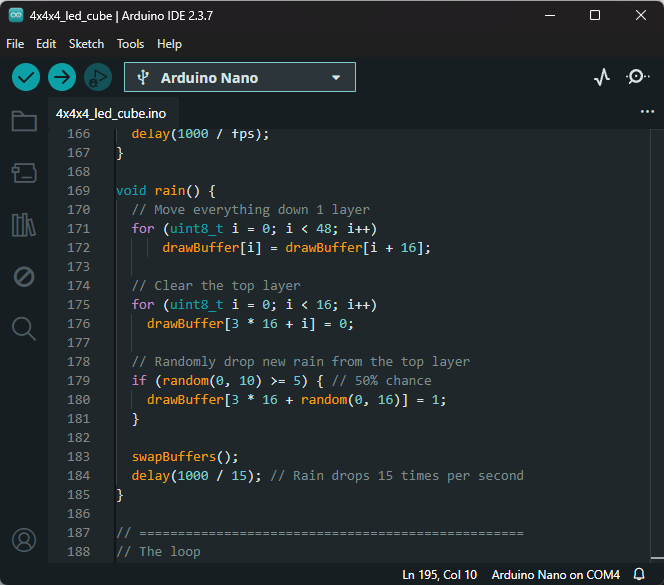
animation!
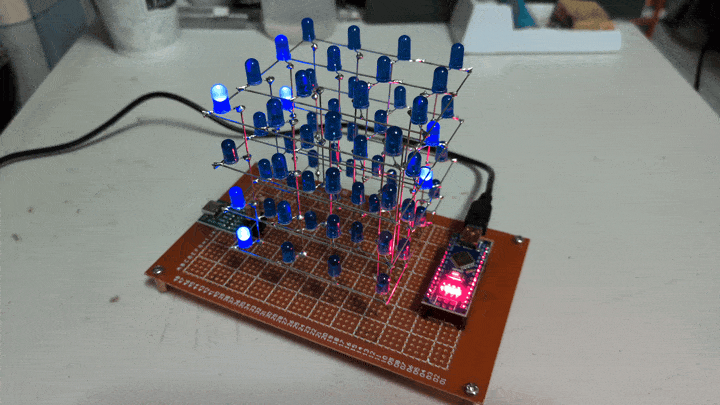
I've just noticed that the leds shine into the ones above them, I don't even have to implement pwm dimming to create the fading trails!
I'll leave this small exercise to the new owners
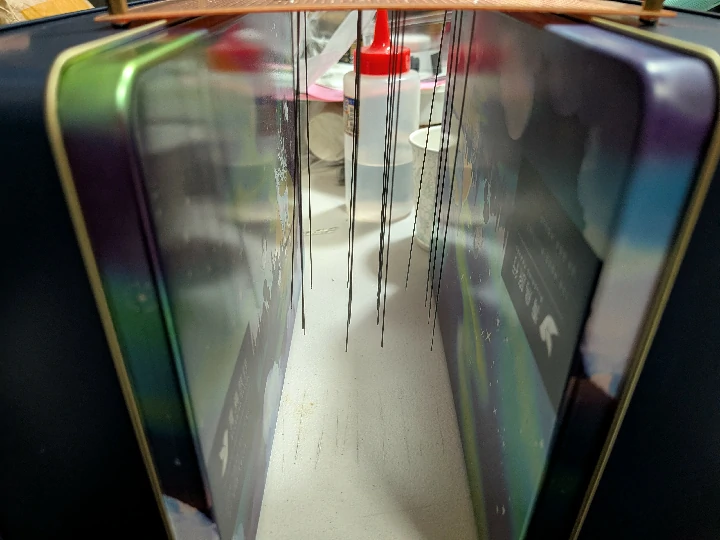
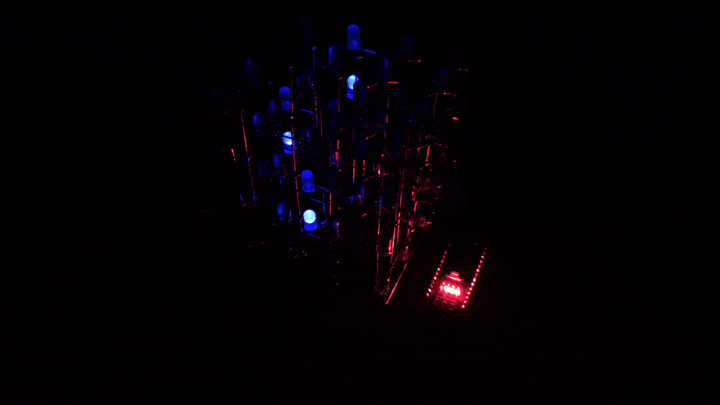
raining into the night!
acrylic case!
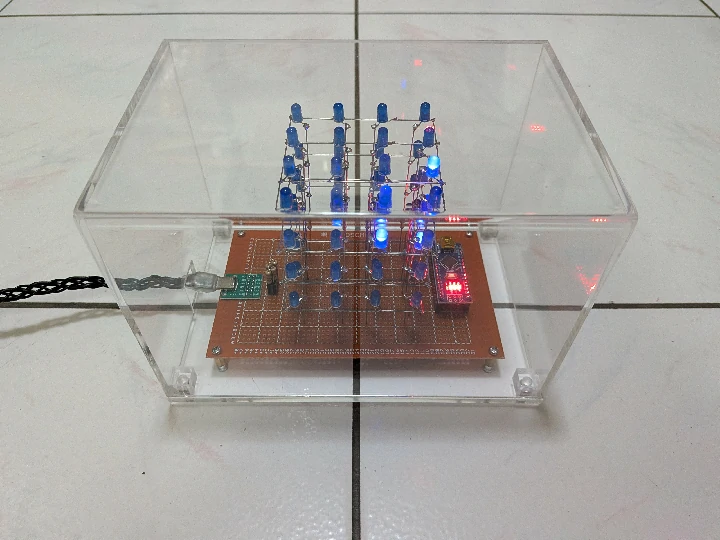
鴻謦壓克力 helped design and make it, although I forgot to tell them about the hole for the power plug...
fortunately I went to order a plastic jig later that day, also gave the finished case a check
it's already assembled and glued so they could only hand sew the hole from the edge
a bit of a disappointment, but anyways, I've already spent enough on it
wrapping it up!
can't believe I'm wrapping presents for the first time in my life
the ribbon is too short to make a cross, ahhhhhh

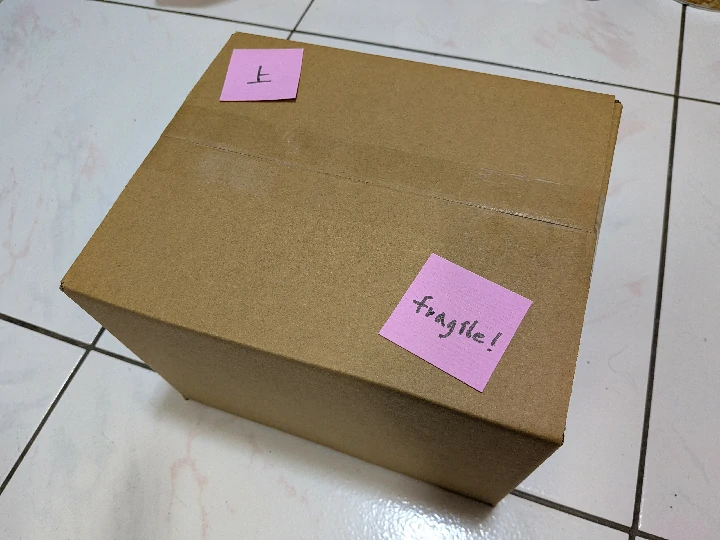
let's protect it with a box
protect it even more with a trash bag, ain't no one is gonna steal it
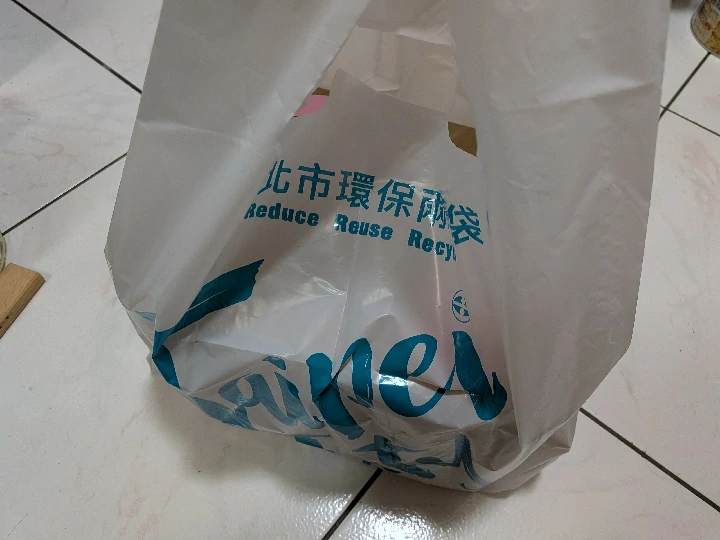
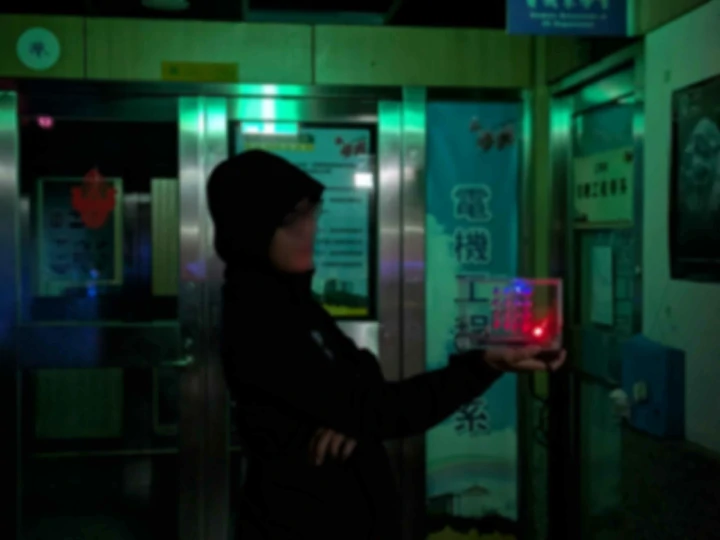
done! merry christmas!
how to play with it?
do not connect both the usb c and mini usb ports at the same time!
it's preprogrammed with the rain animation, just simply plug an usb a to usb c cable into the side usb c port and it will run
there will be extra resistors in the gift (1k, 2k, 3.3k, 5.6k ohm), which can be used to change the brightness of leds, the preinstalled ones are 4.7k ohm
how to program it?
programming can be done with the onboard mini usb port, the side usb c port is only for power
download and install the arduino ide, open it
download! the example sketch, unzip, and open it in the ide
each arduino sketch must be placed in its own folder with the sketch name, the ide will enforce this
install the TimerOne library
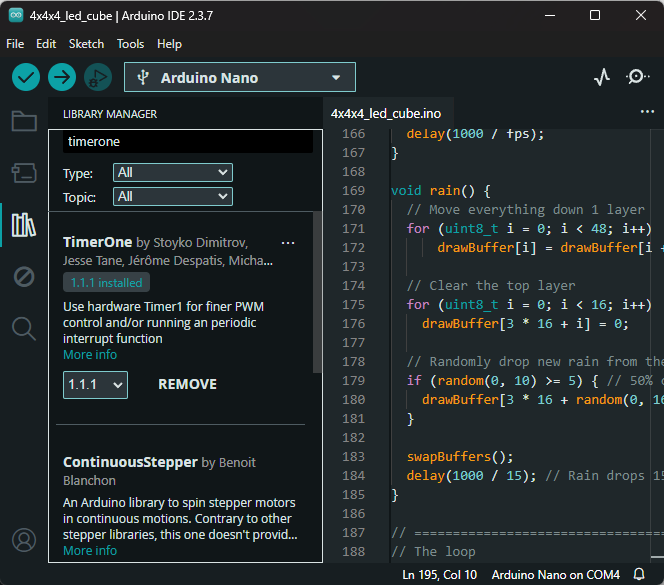
connect the arduino nano to your computer and select the port
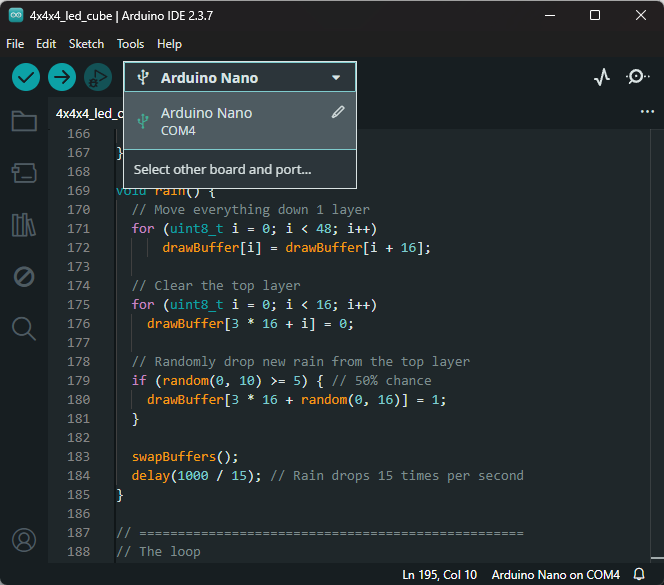
the code should already have enough comments, modify the animations as you want, or design new ones
then smash the upload button and watch it glow!

possible issues
avrdude: ser_open(): can't set com-state
install the older ch340 driver from https://learn.sparkfun.com/tutorials/how-to-install-ch340-drivers/all#drivers-if-you-need-them
the wrap up (literally)
thanks for reading this far!
I was a bit very nervous about how the gift would compare to others, since it's basically just a decoration
turns out, the cube took the second place in the gift exchange! although a projector took the first place
I got it :) I love it too!
anyways, seeing people smile was more than enough for me
but sadly, I ended up making only one cube before christmas arrived, because I deliberately needed a rest, I was really exhausted due to the 3 hour commute and the late decision to make led cubes
about my own cube, I'll do it later...
here is the new owner!
how long it took
holy hell, I didn't expect to spend so much time and money on it, lol
at least it was fun!
The time you enjoy wasting is not wasted time.
- many people
these are the rough times measured for the second cube, some are from my google timeline history
| step | time spent (hh:mm) | notes |
|---|---|---|
| project decision | n/a | |
| sourcing materials | 04:00 (total) | parts, wrapping paper, box |
| led bending | 00:28 | bending 64 leds' legs |
| layer soldering | 01:06 | soldering each of the 4 layers |
| cube soldering | 00:26 | soldering layers together, vertical wires |
| wiring | 03:00 | connecting every other parts |
| programming | 01:00 (total) | |
| case design & collaboration | 01:30 (total) | acrylic case |
| writing the blog | many hours | over many days |
| total | nearly 24 hours | if counting everything |
ingredients & cost
| ingredient | flavor | quantity | cost (ntd) | notes |
|---|---|---|---|---|
| 🩷 | rgb? sorry I have no heart | 1 | 10000 | |
| led | blue 5mm | 64 | 115.2 | bought 200 and got a 10% discount |
| arduino nano clone | 1 | 65 | bought a while ago, can't remember | |
| perfboard | 9x15cm | 1 | 25 | |
| usb a to mini cable | 75cm | 1 | 25 | |
| type c breakout board | 1 | 20 | ||
| rubber feet | 10x3mm | 4 | 7.5 | |
| resistor | 5.6k 1/2w | 4 | 2 | |
| resistor | 4.7k 1/2w | 4 | 2 | |
| resistor | 3.3k 1/2w | 4 | 2 | |
| resistor | 2.2k 1/2w | 4 | 2 | |
| resistor | 1k 1/2w | 4 | 2 | |
| acrylic case | 1 | 450 | damn... | |
| wrapping paper | 25 | |||
| ribbon | 25 | |||
| corrugated box | 23x19x16 | 1 | 18 | |
| tinned copper wire | 23awg | |||
| stranded wire | 24awg | |||
| female header | 2.54mm | 30 | ||
| brass standoff | m3x10mm | 4 | ||
| screw | m3x5mm | 4 | ||
| screw | m3x10mm | 4 | ||
| total cost | 784.7 |
so funny, there's a react-snowfall package perfect for this post
put it under the truncation mark so it wouldn't leak into the index page
<!-- truncate -->

import Snowfall from 'react-snowfall';

<Snowfall style={{ position: 'fixed', width: '100vw', height: '100vh', 'z-index': 1000 }} />
is it annoying in dark mode? sorry 😛
there's something special about a handmade gift, have you ever thought about making one yourself?
would you skip classes to make it?
if you were to code an animation for the cube, what would it be?